Draw spring flowers in just 6 straightforward measures! Everyone has a favorite season that they look forward to in the year. No subject how greatly you value the chill of winter or the elongated merry daytimes of summer, it’s challenging not to relish the eyes of the ball. You may also learn many things cartoon drawing, scary drawing, drawing of sunflower pencil drawing, cool things to draw, scary drawing, creative drawing, and flower drawing.
This is when the trees bud gorgeous overgrown leaves and the blossoms flower. It is a wonderful time of the year for flower lovers, and they often enjoy creating beautiful works of art by learning to draw spring flowers. If you like the joys of spring, this will be a perfect guide for you! It’s the one you’ll want to see through to the end. This step-by-step guide on how to draw spring flowers in just 6 easy steps will fill you with the joys of spring!
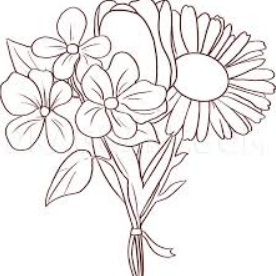
How to draw spring flowers – Allow’s acquire created! Stage 1
We’ll draw a nice selection of flowers as we work through this guide on drawing spring flowers. For this first step, we will draw some flowers’ outlines. For the two flowers we’re drawing in this first step, you can draw several long, curved shapes that form around a round center for the petals. Next, we’ll use more curved lines with pointed tips for some of the leaves surrounding them, and there will be a line down the center of each leaf. This will leave you ready to add to that beautiful image in the next step of the guide!
Step 2 – Now draw another flower
This second step will see you add another pretty flower to this spring flower design. This one will be similar in structure to the first two you drew, but there will be some subtle differences. First, we’ll draw a circular center for the flower. This will be drawn using a slightly jagged line. Then the petals surrounding this center will also be drawn with curved lines, but they will have pointed tips instead of rounded ones. You can then draw skinny leaves with some larger ones included as well. That’s all there is to it for now, and once that’s done, we can move on to step three of this guide.
Step 3: Draw other flowers for this arrangement.
You can always have a few flowers, and that’s certainly true of this design! That is why we will add two more flowers at the bottom of this third step of our guide on drawing spring flowers. These next few flowers will also be slightly different from the previous ones we’ve drawn. Both flowers will have smooth circular centers, and the petals will be prominent and round. One of the flowers will be slightly smaller than the other, and we will also surround these flowers with some additional leaves. This will get you ready for step 4 of the guide!
Step 4: Next, draw some details for the first flowers.
For this step of your spring flower drawing, we’ll go back to where you started by adding some detail to the first two flowers you drew for this arrangement. You can begin by drawing two soft circles in the center of each of these flowers. Once these are drawn, you can surround these circular centers with a few small jagged lines for additional detail. Once it looks like our reference image, you’re ready for step five of the guide, where we’ll wrap up some final details and elements.
Step 5: Add Final Details to Your Spring Flower Drawing
You’ll also have the option to add some final extra details, but we’ll focus on the details in this guide first. First, we’re going to add some small, curved lines to the petals of these flowers to give them some extra textural detail. You can then add vein details to the leaves surrounding the flowers. This will get you ready for the final step of the guide! Before continuing, you can also add some additional details. These could include more flowers for the arrangement or a fun background. What else can you think of to complete this incredible image?
Step 6: Finish your drawing of spring flowers with color
This is the final step of this spring flower design, and now you can add some wonderful colors to finish it. In our sample image, we show you some of the colors that you could use to complete.
Share this content: